
 One of the less discussed features of iOS 8 is the addition of a time-lapse photography mode for the iPhone camera. Time-lapse photography can be very compelling, and previously it could be difficult to achieve, requiring either a special dedicated time-lapse camera like a Brinno, taking individual images and putting them together, or in some cases editing a video and removing frames to give you the fast motion effects.
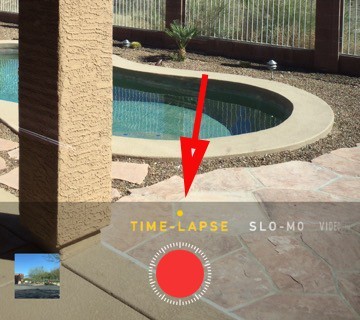
In true Apple fashion, taking a time-lapse movie with the iPhone is really, really easy. The time-lapse setting is the option all the way to the left, next to the slo-mo option. To get started, set your phone down where it won’t move and hit the red start button. That’s it.
There are some hardware requirements. You must have an iPhone 4s or later, and of course you need to be running iOS 8. An iPad 2 or later also works, along with an iPod touch 5G.
What about setting timers or the number of frames? Apple makes the judgements for you. The software selects the number of frames it shoots depending upon the length of your video. The longer your video is, the fewer frames will get recorded. How does the camera know in advance how long the video will be? It doesn’t, but in the post processing it removes frames from longer videos. The result will be that the longer the video, the faster the perceived motion. The length of the video won’t change much as you shoot for a longer time. Apple is going to make sure you don’t run out of space.
Apple says a time-lapse video can record for as long as 30 hours, but if you try that be sure to be plugged in so your power isn’t lost.
Tips for time-lapse
First, the camera needs to be steady, and that means anchored. A small tripod works best. I like the Joby GorillaPod which is highly adjustable. Their are other options around as well. Car mounts can give you impressive videos shooting out the front or rear window of a moving vehicle. The worst option is just walking around. The resulting video will be pretty jerky so the effect will be pretty much lost and headache inducing.
Nice subjects are a crowded shopping area, a setting or rising sun, building storm clouds, even flowers opening and closing.
Here’s a video I shot from the car using the Apple’s built-in time lapse option.
I have a Brinno time-lapse camera and compared my iPhone 6 to it. The results were pretty similar. The Brinno can shoot multiple exposures per frame giving you a light HDR effect, but in general the two devices gave me similar results. The only drawback to the iPhone was the phone was tied up while it was taking the video. I can leave the Brinno outside all day and never miss a call.
Other apps for time-lapse
There are a couple of options if you want to go beyond the basic features Apple provides. Hyperlapse from Instagram is free, and gives you a choice of frame rates and uses automatic stabilization. That makes walking time-lapse videos practical, and it actually works quite well. Lapse It is an interesting app too.This free app allows you to turn existing videos into time-lapse videos, and it has filters along with the ability to add music.
Here’s another quick video driving using the Hyperlapse app from Instagram. It’s smoother because of the stabilization feature.
The Bottom Line
Doing time-lapse is pretty rewarding. The iPhone makes it easy, and I think it is one of the iPhone cameras least used or explored features. Apple has put some amazing tools in our pockets, so give time-lapse a try and see if you like the results.
– Mel Martin
~~~~