
 The latest update to AfterLight, released September 19th, adds a number of great features to an already great photo editor. The 2.0 update adds a new in-app purchase pack, a free filter pack of 16 new filters, separate focus and exposure control to the in-app camera, low light boost support for the iPhone 5, and a few adjustments and bug fixes.
AfterLight’s Camera
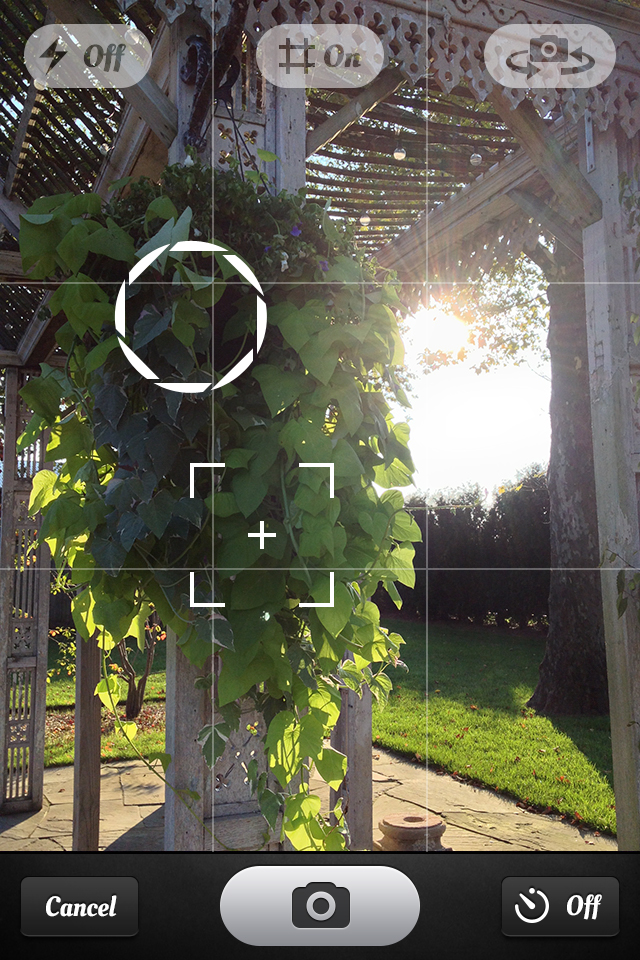 AfterLight’s in-app camera is very similar to the iPhone’s camera app from iOS 6. Along the top of the screen are the options to change the flash settings (on/auto/off), turn the grid overlay on/off, and switch between the front and back camera. Along the bottom is the cancel button which takes you back to the main menu, the shutter button which takes a photo, and the timer button which allows you to set a timer (3, 7 , or 10 seconds) before the shutter automatically takes a photo.
Touching the screen with one finger sets both the focus and exposure to that spot in the scene, while touching the screen with two fingers brings up a focus box and exposure ring which can both be dragged around. Neither can be locked, so moving your device will change the focus and exposure to the spots of your new scene. When you take a photo, it automatically gets saved to the iDevices’s camera roll, so you can take multiple photos before editing them.
AfterLight’s Editing Tools
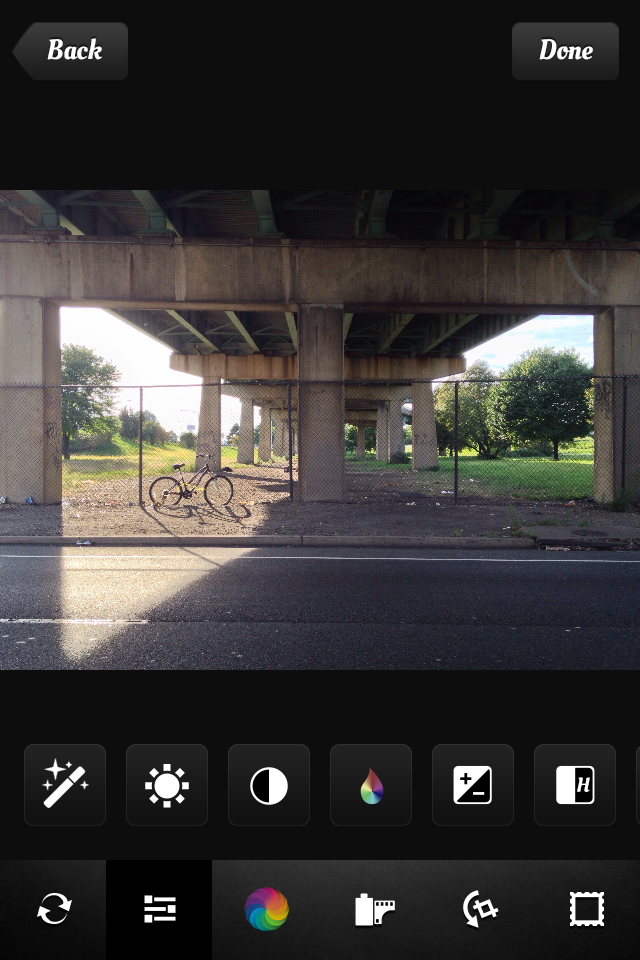
AfterLight’s simple, intuitive interface and its wide array of tools make it a great photo editor for both simple, quick edits or precise, lengthy photo editing. In AfterLight, when you select a photo from your camera roll, it gives you a fullscreen preview of the photo rather than jumping right into editing it. From this preview screen you have the option of either using the photo or going back and selecting another photo. This is a great feature for making sure you choose the exact photo you want from a collection of similar images the first time, rather than going back again and again until you get the right one. Once you have confirmed a photo to use, you can begin editing with AfterLight’s large selection of tools. At any point in the editing process you can tap and hold the photo to view the original. There is also an undo button which removes the most recent change to a photo and a revert button which removes all changes to a photo.
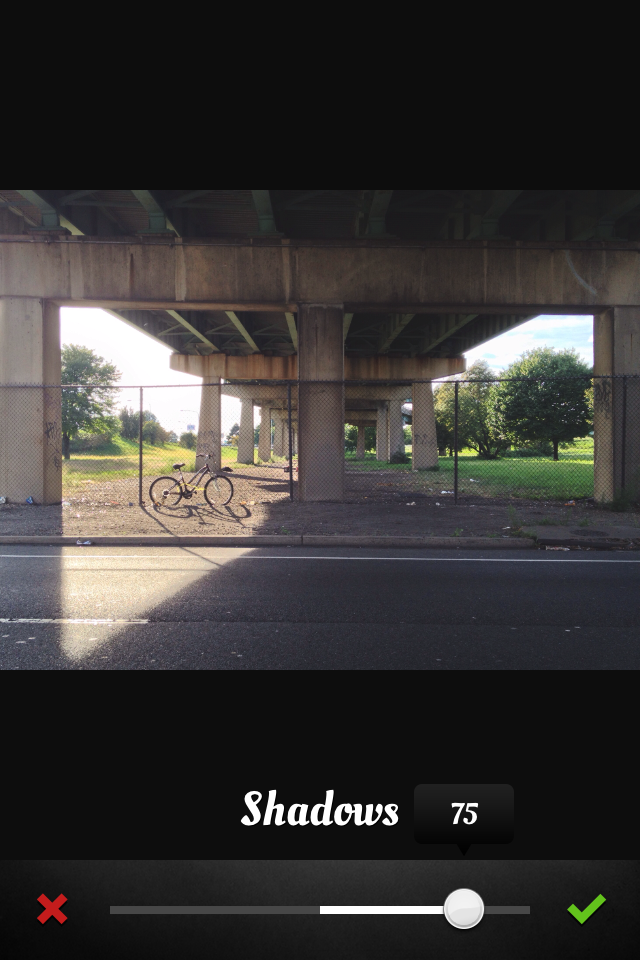
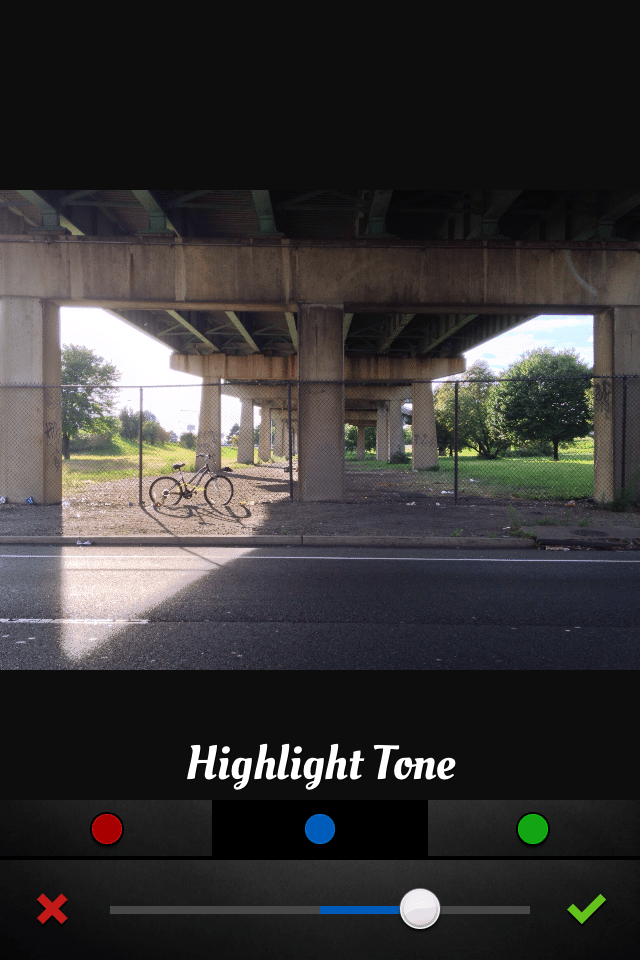
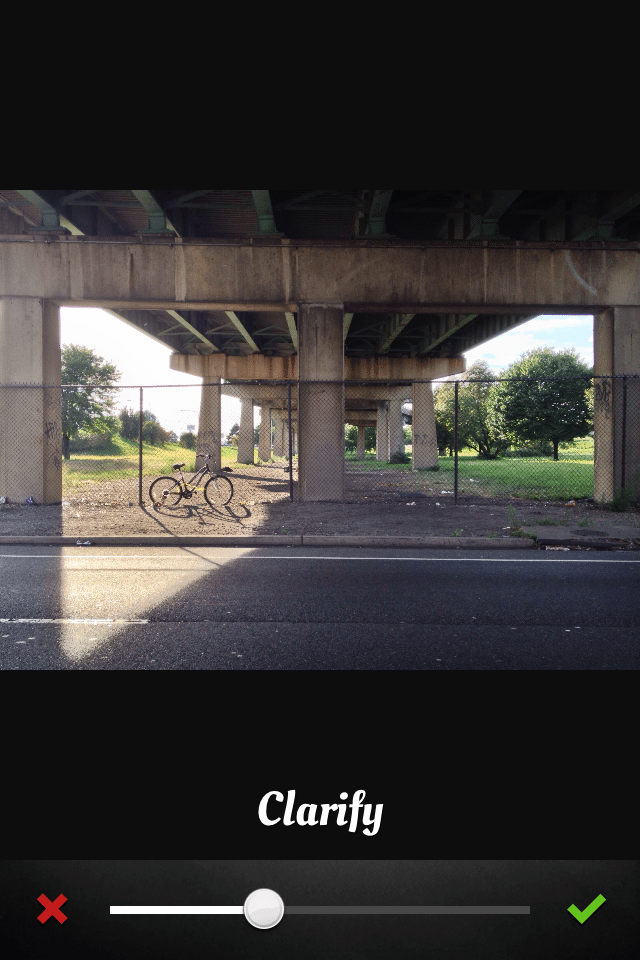
The adjustment tools, in order, are as follows: clarify, brightness, contrast, saturation, exposure, highlights, shadows, fade, highlight tone, mid tone, shadow tone, temperature, vignette, grain, and sharpening (which also does blurring). Each tool has a horizontal slider that can be adjusted positively or negatively to preview the changes. The changes are shown in real-time, which means the adjustments are applied to your photo as you drag the slider. It’s not a drag-and-wait guessing game. The sliders are sort of “weak” in how much they apply an adjustment to a photo. For example, cranking up the exposure tool as high as it will go will not make the photo completely white, nor will cranking it down make it completely black. For this reason, you may have to use the same tool more than once to get your desired outcome. Most of the adjustment tools are standard to all photo editors and function the same way. AfterLight’s more advanced tools are the highlight/mid/shadow tone tools. These tools allow you to add a color tint to the highlight, mid,or shadow tones by either increasing or decreasing the red, blue, or green values in the photo. Another more unique tool is the clarify tool, which gives your photo an adjustable “pop” of depth, contrast, and sharpness without overdoing it.
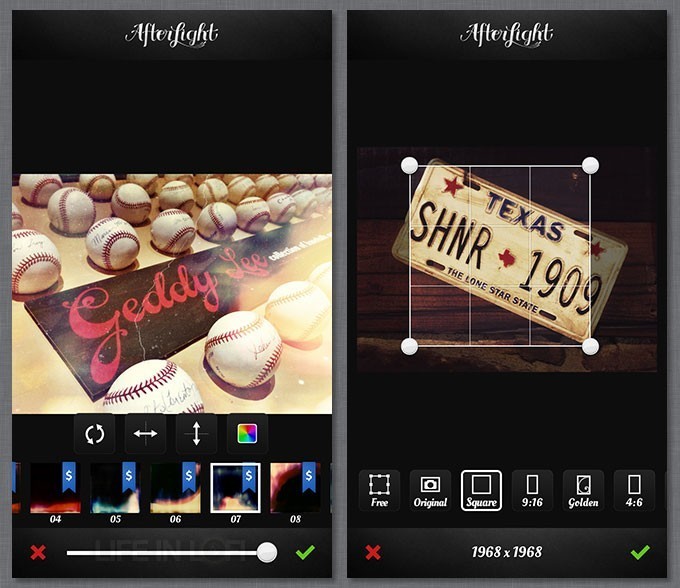
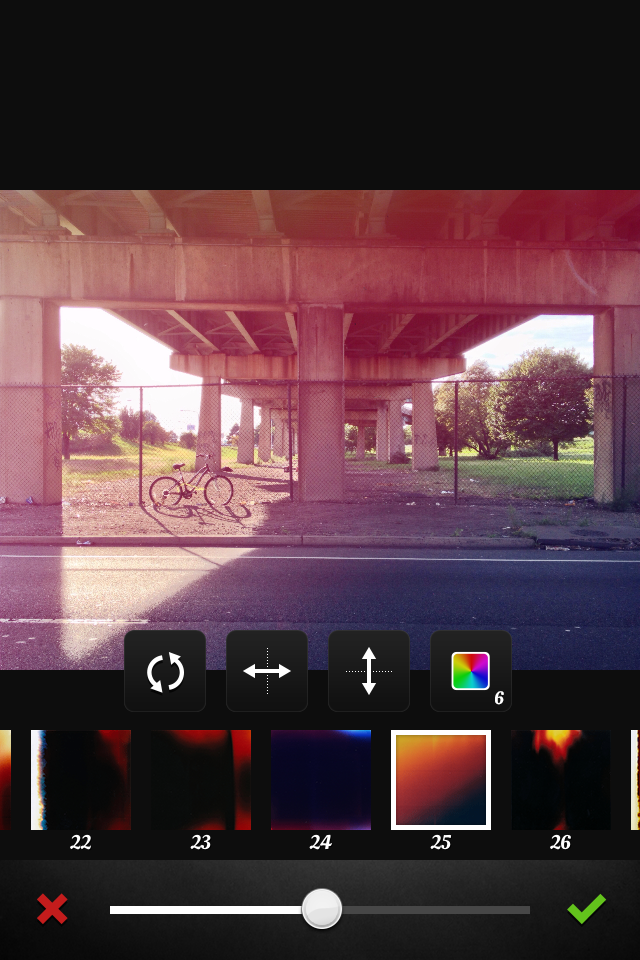
AfterLight also comes with 27 original filters and 30 guest filters. They appear to have all been created from scratch using AfterLight’s own adjustment tools previously mentioned, so they aren’t your typical, overdone cross process/lomo/instant/sepia filters found in most photo editing apps. Just like the adjustment tools, you can adjust the strength of a filter with a slider, and the changes are applied in real-time. These filters are great for applying a quick edit to a photo while still having control over how strong it is.
The composition tools, in order, are as follows: crop, rotate, flip (horizontally), flip (vertically), and straighten. The cropping tool offers free cropping as well as aspect ratios of the original photo, 1:1, 9:16, 1:1,618 (golden), 4:6, 5:7, 3:4, 8:10, and reverse of all of them as well. The dimensions of the image are also shown as you adjust the cropping selection. The rotate and flip tools are pretty straight forward, and the straighten tool allows you to turn the image to the left or right by 15 degrees.
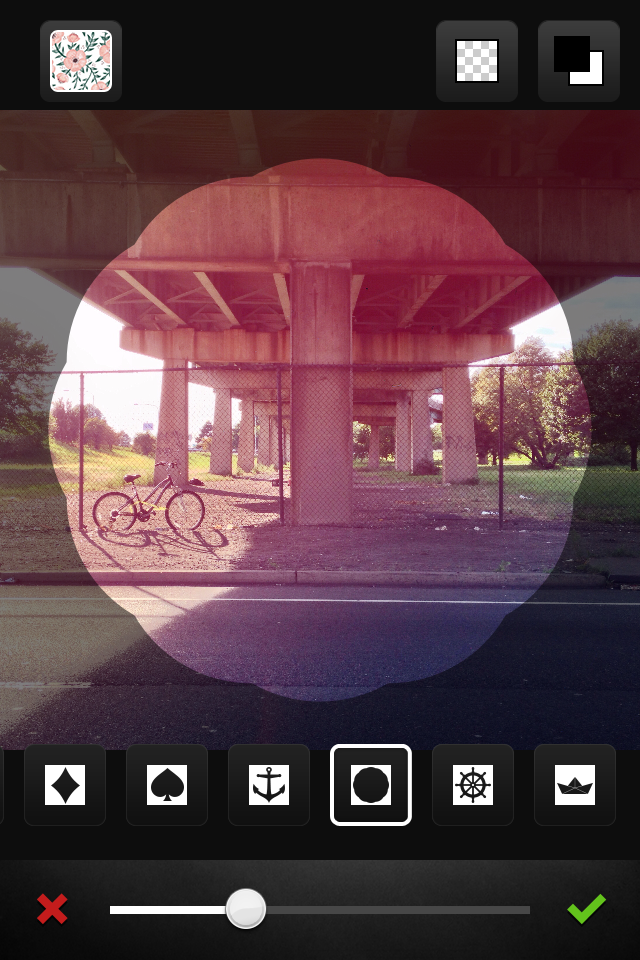
In addition to adjustment tools, filters, and composition tools, AfterLight also includes an impressive 44 textures and 70 frames. The included textures are a variety of high-resolution dust scratches and light leaks. AfterLight began as one of the first apps to let you add light leaks to a photo when it was first released in November 2012, and it still remains arguably the best in the App Store with the quality of its textures and its tools to adjust them. You can adjust a texture’s opacity with a slider, rotate them (in increments of 90 degrees), flip them, and in some cases, adjust pre-set hues (for light leaks) or invert the black and whites. The included frames are a variety of shapes as well as A-Z, 0-9, and a few symbols. One of the frames turns a portrait or landscape photo into a square photo by putting bars on both sides. This is a great feature because it eliminates the need to have an app on your iDevice solely for making a square photo for Instagram while maintaining the aspect ratio of the photo. The frame’s scale and opacity can both be adjusted using sliders and the frame’s color can be inverted from white to black. There is an Instant Film pack available for $0.99 which includes an additional 22 textures and 7 frames, and a Wallpapaer pack available for $0.99 which includes 15 hand-drawn patterns that are applied to a frame.
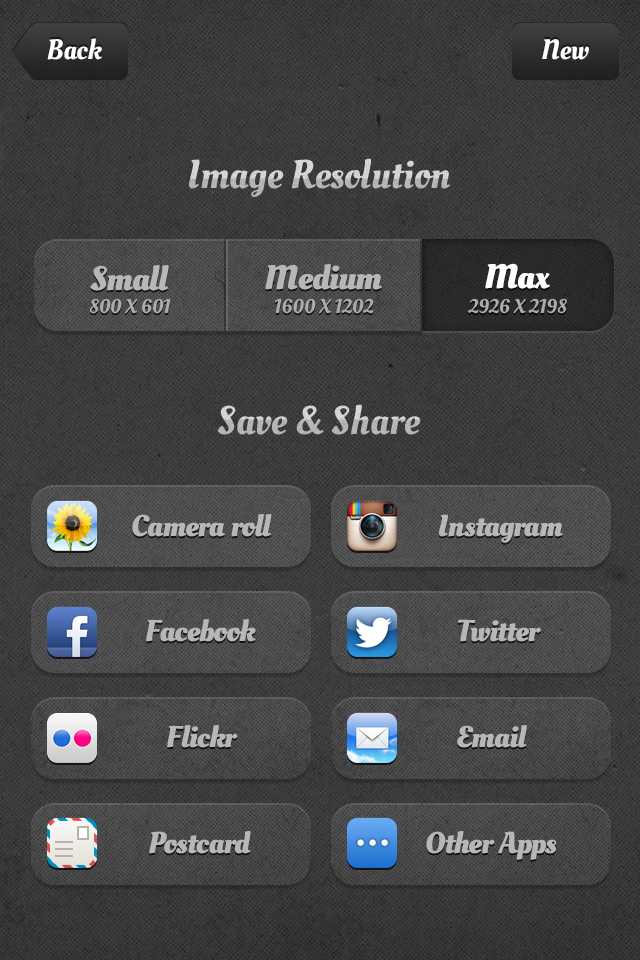
When you are done editing a photo, you can choose the resolution (small, medium, maximum) – which have different pixel dimensions depending on the size of the original photo – and where you would like to save or share to which includes your camera roll, Facebook, Twitter, Instagram, Flickr, e-mail, postcard (via Sincerely), or other apps installed on your iDevice.
AfterLight’s Settings
While AfterLight only has a few settings, they are very convenient to access and adjust quickly since they are located on the main menu. The settings are as follows:
- Start the app in Camera Mode – By default this is disabled. When enabled, this opens AfterLight to the in-app camera. This is a great feature if you would like to use AfterLight as a replacement to your iDevice’s camera app.
- Save the EXIF and location data – When enabled, AfterLight embeds EXIF and location data when taking photos with the in-app camera (provided you granted it access to use your location in your iDevices’s Settings > Privacy > Location Services. If not, then it just saves EXIF data) and preserves EXIF and location data of existing photos in your camera roll when saving/exporting. When disabled, EXIF and location data is not embedded when taking photos with the in-app camera and is not preserved when saving/exporting.
- Use full resolution image – When enabled, the maximum resolution when saving/exporting is 4096×4096. When disabled, the maximum resolution when saving/exporting is 2048×2048.
- Auto finalize filters & textures – I honestly don’t know what this does.
- Low light boost – Enables low light boost on the iPhone 5 and greater.
Conclusions
AfterLight is a great photo editing app for both beginners and experts. It’s easy to quickly straighten or make simple edits to a photo before uploading it to a Facebook or Twitter, as well as great for editing a beautiful photo for Instagram or Flickr. With the 2.0 update, the developers of AfterLight continue to prove why AfterLight has remained on the top charts in the App Store.
Some features I’d like to see in a future update would be a noise reduction tool, an in-app library, and non-destructive editing so that you could go back to edited photos and see the adjustments you’ve made and make changes.
AfterLight is available in the App Store for $0.99. Compatibility: Requires iOS 5.0 or later. Compatible with iPhone, iPad, and iPod touch. This app is optimized for iPhone 5.
App Store link: Afterlight – Simon Filip
~~~~
AfterLight 2.0
Toolbox
Resolution & Image Quality
User Interface
Price
Excellent
A simple and intuitive interface combined a wide array of editing tools, filters, textures, and frames, AfterLight is a must-have app for photo editing.