
UPDATED March 2015 – Most of the time, Life In LoFi focuses on getting the highest quality image in camera so you can app it into digital lo-fi afterwards. In his first post for us, Photographer/iPhoneographer Sid Peña explains how he gets impressive results getting high quality images for oversize prints using his iPhone. =M=
My Workflow Secrets:
Creating High Resolution Images on iPhone 5
by Sid Peña
Most iPhoneographers would love to create high resolution, detailed, print-ready images. High quality output greatly increases the desire for your work across many venues of the graphics industry. Larger prints mean more potential buyers, higher DPI means more detail in those reproductions which could lead to more industry recognition and possibly more green in your pocket.

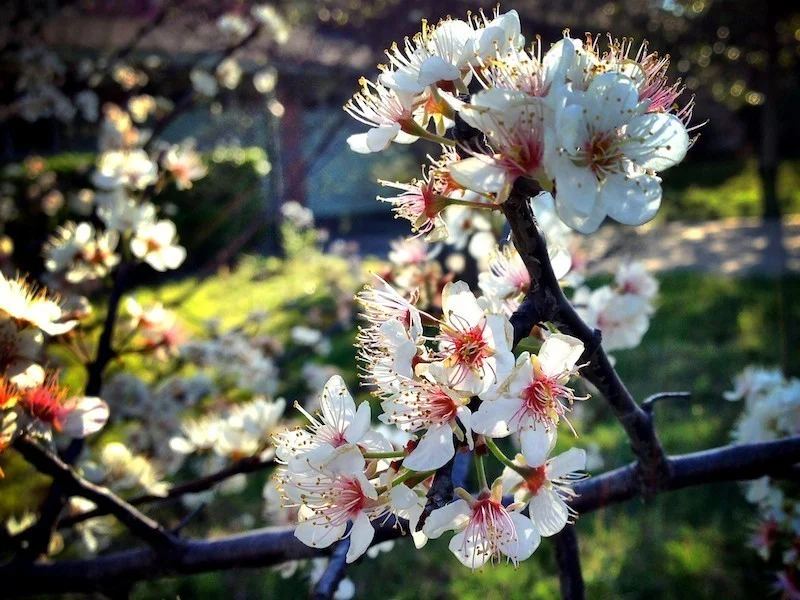
Cherry Blossoms by Sid Peña
I’m going to show you the basic workflow I use on 90% of my photos. This tutorial will take you from snapping the photo to a finished image with a resolution of 4896 x 3672, DPI of 300 x 300 and a way to create a master RAW image in TIFF format for archiving.
To follow this tutorial you will need:
- an iPhone 5 or newer (an iPhone 4S should also work nearly as well. =M=)
- ClearCam (Unfortunately, no longer available. See below.)
- Snapseed (Free, App Store link)
- Photogene 4 ($2.99, App Store link)
- KitCam (Since this post was written, the original KitCam has also been deleted from the App Store. There are a number of KitCam clones currently available, but none work nearly as well as the original app. =M= )
- Filterstorm, ($3.99, App Store link) (
(Since this post was originally published in 2013, several of the photo apps above have been end-of-lifed and are no longer available in the App Store. Here is a list of comparable photo apps you can use in place of them: )
- Cortex Camera, ($2.99, App Store link) – can be used in place of ClearCam.
- Hydra – Amazing Photography ($2.99, App Store link) – can also replace ClearCam,
- Camera+ – a powerful, all-in-one camera app with a lot of tools and then some. Can be used in place of KitCam.
The Base Image
When I worked as a roadie, a sound engineer once explained why the band onstage sounded so bad. He said, “Crap in, loud crap out.” In other words, if you want a high quality result you need to start with the highest quality ingredients. The first ingredient is a crisp, clear photo which incorporates a great subject, composition and tone. I can’t help you with subject, composition and tone but for a crisp clear photo; “There’s an app for that!”
ClearCam is my goto Camera Replacement app for 95% of my shots, and for good reason. It does what it does amazingly well, which is produce sharp, high resolution images. With a tripod you can get images so tack sharp that only a pro could discern them from DSLR images. The way it works is it shoots 6 frames in fast succession and then you apply an align and enhance process from the app’s photo queue.
Editor’s Note: Cortex Camera, ($2.99, App Store link) is a favorite of ours. It still works in iOS 9 and it does a lot of what the now-unavailable ClearCam did. =M=
There are two shooting modes in ClearCam, Quick and Enhanced. I use the Enhanced mode because the Quick mode only produces native resolution images. ClearCam also has some quirky characteristics you should take into consideration when framing your images or preparing for the next shot. The ClearCam screen only displays 16:9 aspect ratio but the resulting photo will be in full 4:3. This means that in portrait mode you can’t see what is just to the left or right of the screen or in landscape mode what is just above or below the upper and lower limits of the viewable screen. When you process the image that area will be visible. After I got used to this issue it was easy to frame my shot properly. Also, I found that if you close the app with the home button or turn off the screen by pressing the power button before ClearCam has finished processing your last shot, that image will not be there when you go back to the app. If you need to shoot a burst or rapid succession, this is not the app you’re looking for.
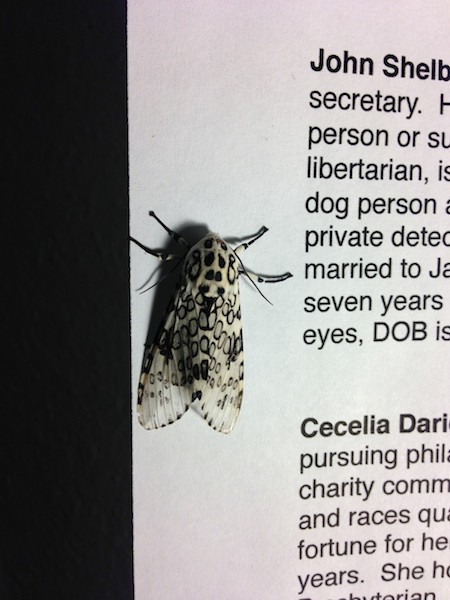
Original image as captured by ClearCam
The size of the processed RAW images in ClearCam is formidable (about 70MB to 90MB). On my first day of SXSW 2013, I had about 4GB of available space on my 16GB iPhone 5 and hit capacity after about 40 photos. Since I didn’t bring my MacBook Pro with me I was forced to align, enhance, export and delete lots of the ClearCam files to free up the needed space (the next day I had my MacBook with me).
One quirky characteristic of ClearCam that I love is the effect the align and enhance process has on moving subjects. In my photo, The IT Crowd, the motion blurs and double and triple exposure effects really provide a dynamic feel to the image. I suggest playing around with this to see what kind of results you get, your mileage may vary.
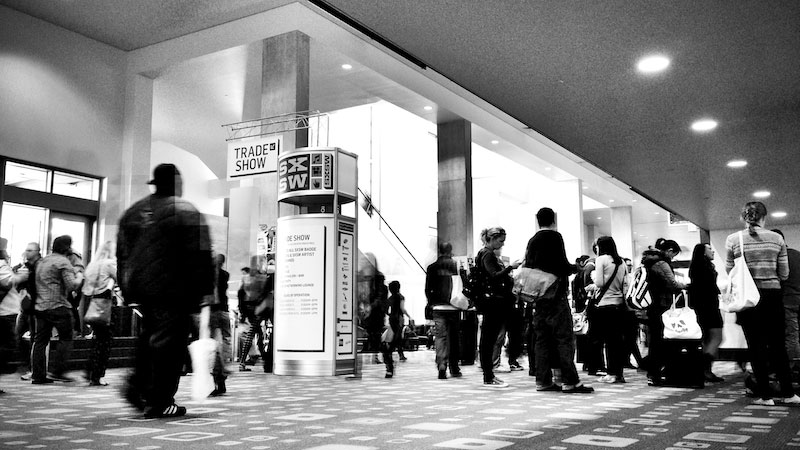
The IT Crowd by Sid Peña
The Sharper Image
Once you have a good base image from ClearCam, it’s time to take it into SnapSeed for a little Detailing. This is a quick and simple way to really make the final image pop. I always dial Sharpening to 20 and Structure to 5, then save and export to Camera Roll. Anything higher and you start flirting with Edge Glow and what I call Retina Burn (a common result of over zealous HDR).
This article continues on Page 2